
Add an extra layer of protection to your Skype account by enabling 2FA
- jul
- 13

Add an extra layer of protection to your Skype account by enabling two-factor authentication.
Two-factor authentication (2FA) adds an extra layer of protection to your accounts by requiring you to enter the second piece of secure info (other than your password) to sign in. You can put 2FA on a lot of things — and you should put it on everything possible — and it's super helpful in preventing people from accessing your accounts maliciously.
Skype accounts support two-factor authentication via a phone number or authenticator app. Here's how you can set up 2FA on your Skype account.
- How to enable two-factor authentication for Skype via text message
How to enable two-factor authentication for Skype via authentication app
How to enable two-factor authentication for Skype via text message
In case you didn't know, Skype is owned by Microsoft so your Skype account is a Microsoft account. Tp set up two-factor authentication on SKype, you need to set it up on your Microsoft account. Here's how you can do it via text!
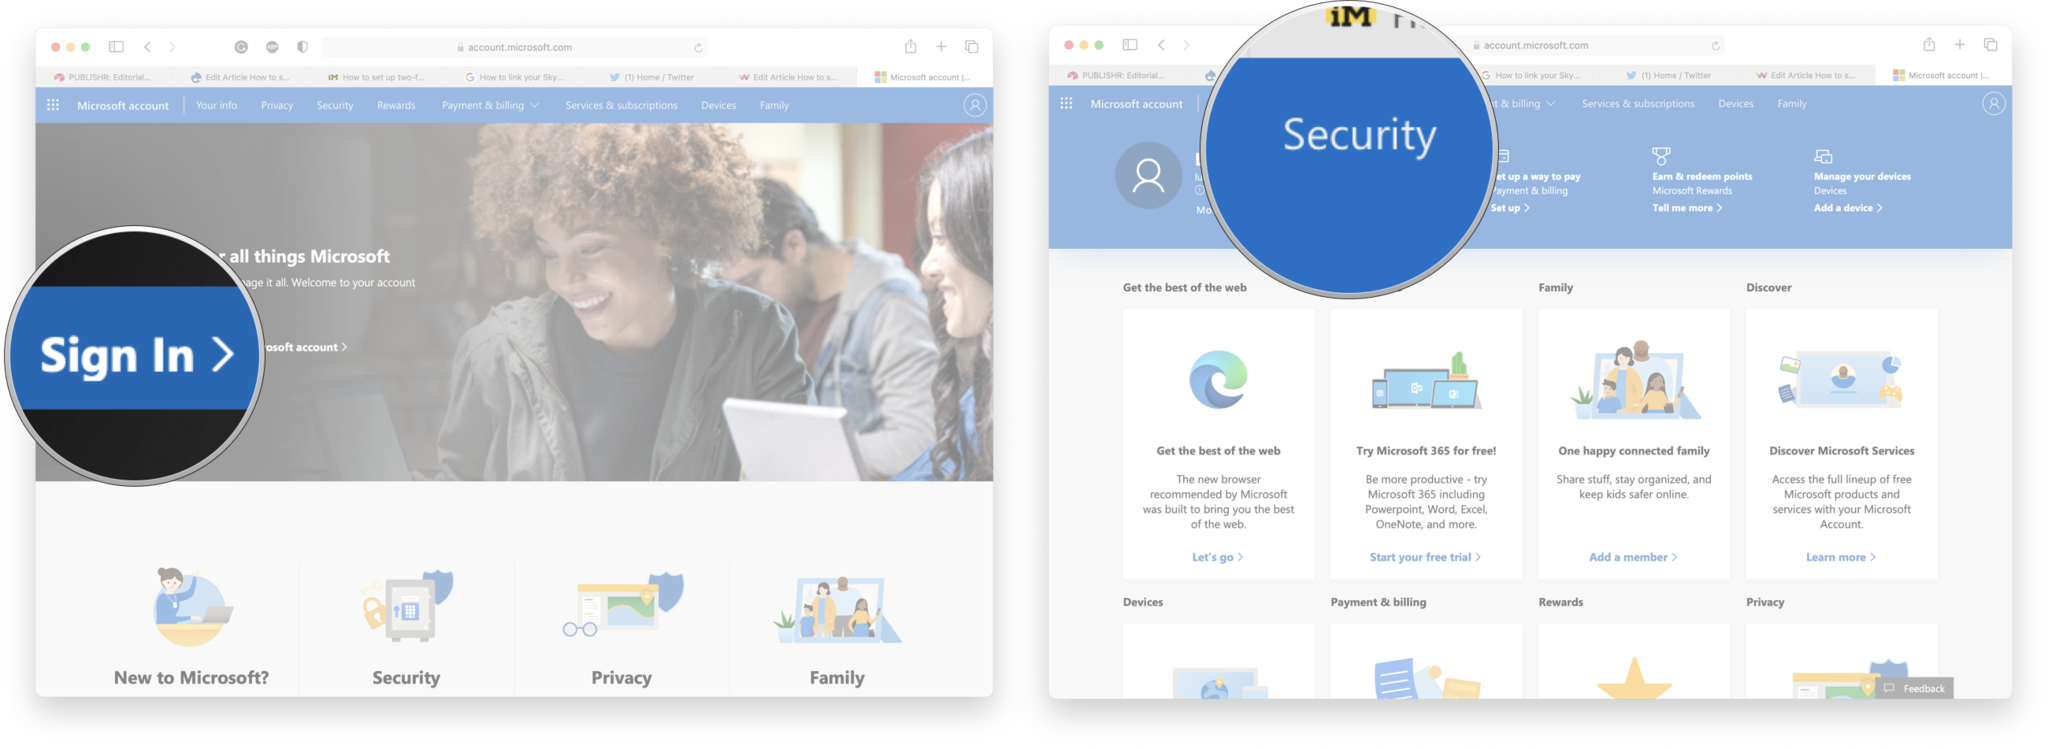
- Open your Microsoft account online.
- Click Sign-in and enter your credentials if prompted.
Click the Security tab.
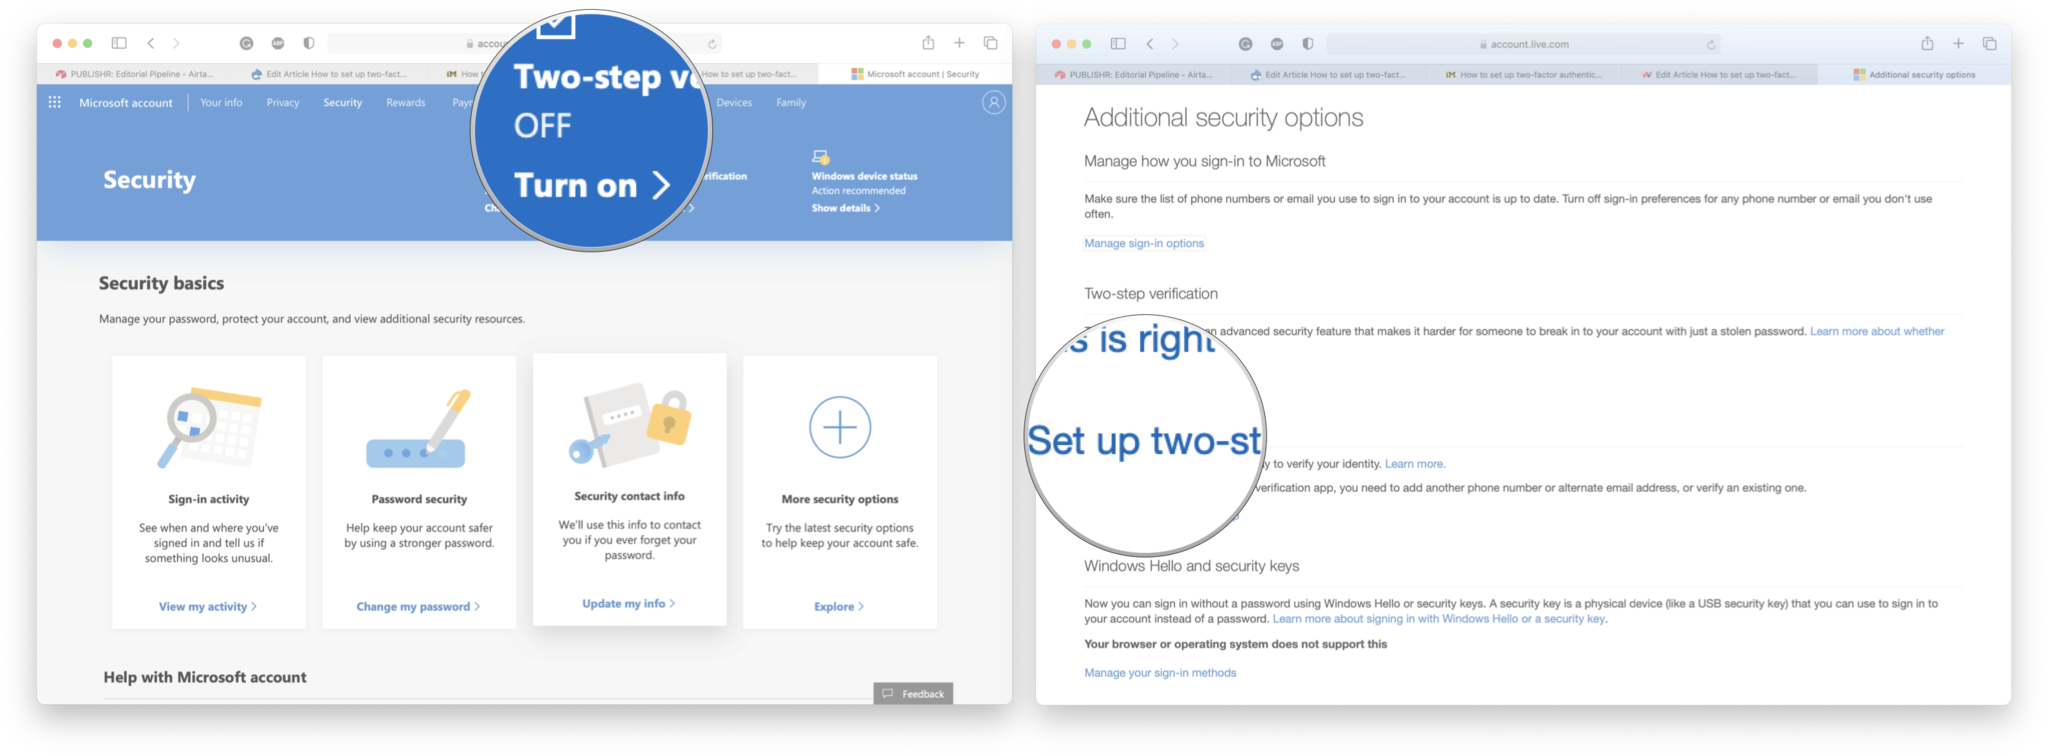
Click the Turn on option for Two-factor authentication at the top of the page.
Click Set up two-step verification.
Click Next.
Click *A phone number** from the dropdown menu.
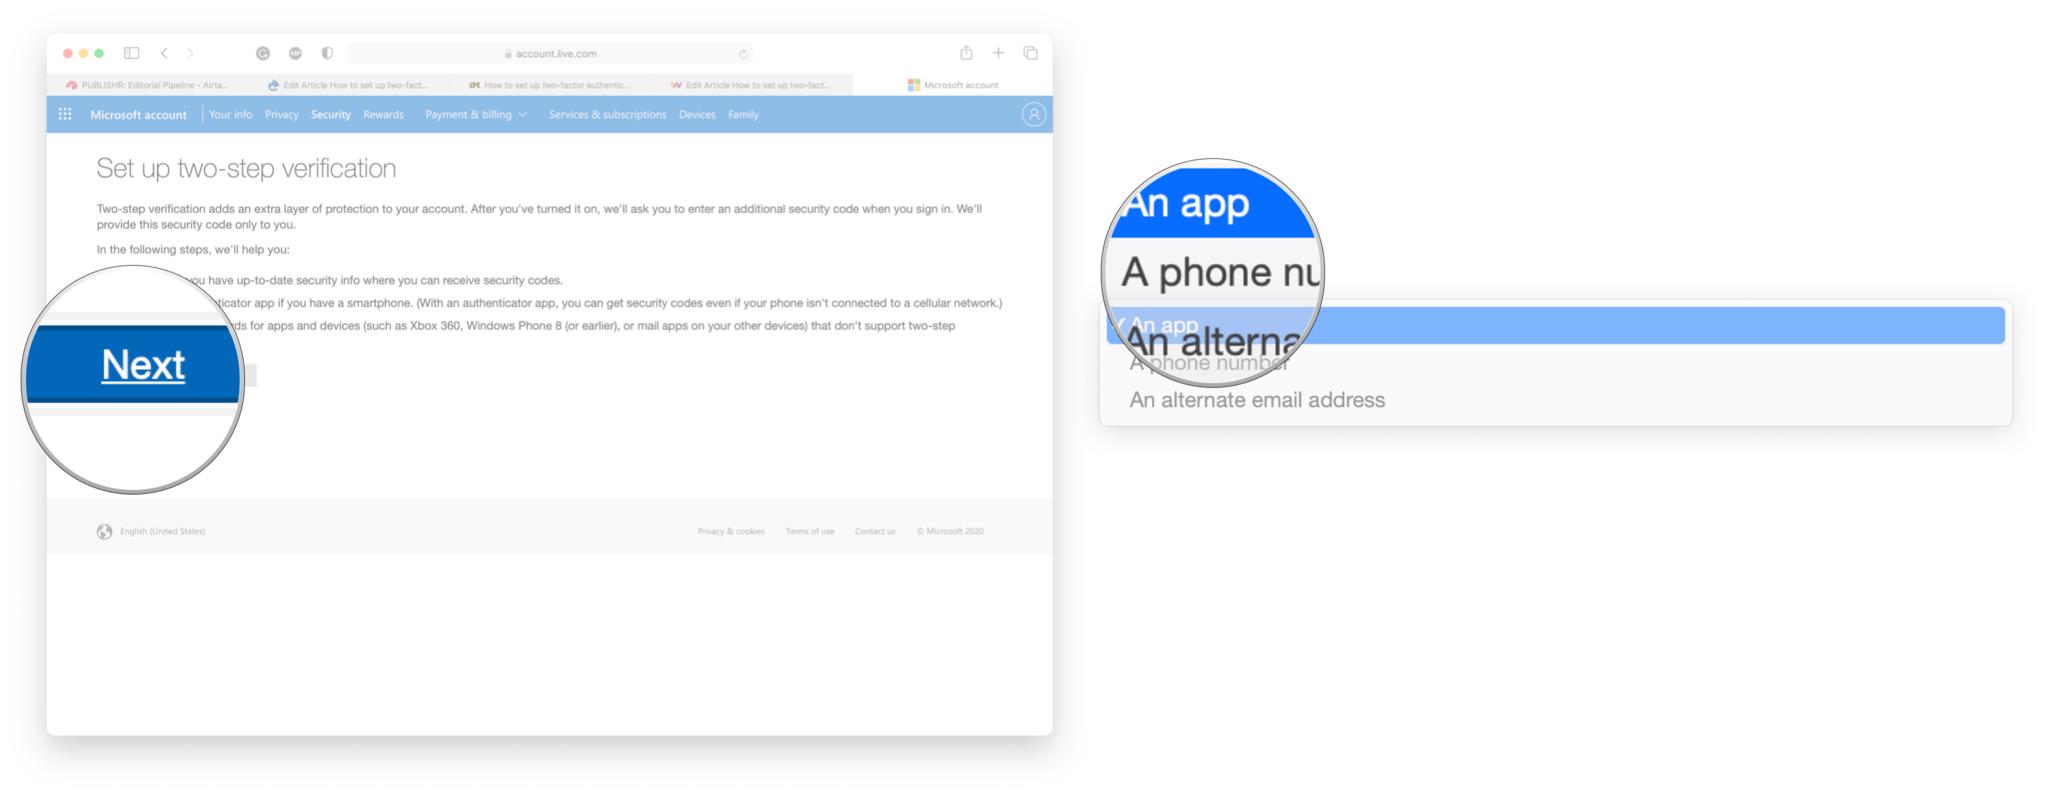
Enter your phone number.
Click Next.

Enter the code you received via text message.
Click Next.

Now anytime you sign in to your Skype account, you'll need to enter the confirmation code that will be texted to you.
How to enable two-factor authentication for Skype via authentication app
Every authentication app is a tad different, but setting up 2FA with an app is a similar process for regardless of which one your pick. For this example, I used the Google Authenticator app for iPhone.
- Open your Microsoft account online.
- Click Sign-in and enter your credentials if prompted.
Click the Security tab.
Click the Turn on option for Two-factor authentication at the top of the page.
Click Set up two-step verification.
Click Next.
Choose An app form the dropdown menu.
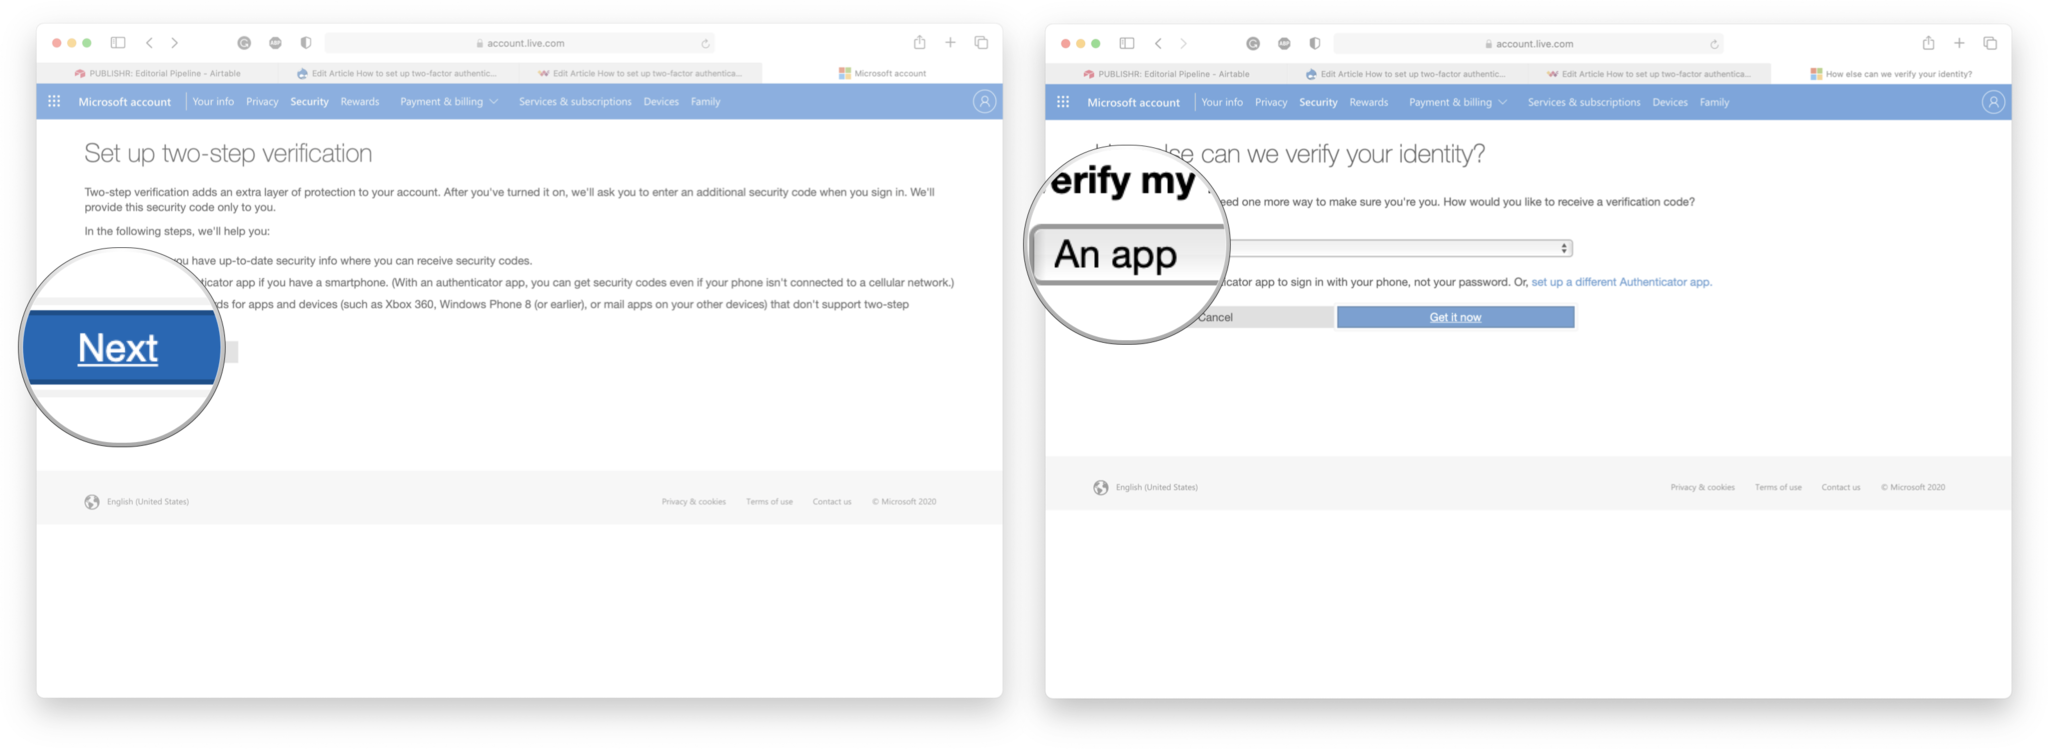
Click Set up a different authenticator app.
- Follow the prompts on the screen
Click Next when completed.

That's it! now you'll need to enter the confirmation code from your authenticator app every time you want to sign in to Skype.
Any Questions?
Let us know in the comments down below!
Updated July 2020: Updated to show new steps for setting up 2FA for Skype.
Keep yourself secure on the web
- How to use two-factor authentication
- How to protect your data from being hacked
- How to quickly temporarily disable Face ID
- Best practices for staying safe on social media
- Best VPN services
- How to lock down your data on iPhone and iPad
- Best ways to increase iPhone and iPad security
- How to back up your iPhone, iPad, and Mac
- Differential privacy — Everything you need to know!