How to create a bootable installer for macOS Sierra
- sep
- 20

It's never a bad idea to have a bootable copy of macOS Sierra!
Whether you need to install macOS Sierra on a bunch of devices or you just want to avoid re-downloading the installer from the Mac App Store if you ever need it in the future, consider creating a bootable installer. You can use it on a hard drive partition for dual-software installation, to install on multiple Macs in your home, or as a bootable drive if you can't use the Internet Recovery partition. It also will make it much easier to downgrade from a newer version of macOS back to Sierra if the next iteration of macOS doesn't suit your fancy.
- Before you start
- How to format your external drive for Mac
- How to make your external drive bootable for macOS Sierra
- How to use macOS Sierra with a bootable drive
Before you start
Before you get started, make sure you have a thumb drive with at least 8GB of storage, or a spare external hard drive (one you aren't planning to use for anything else). You'll also need to download macOS Sierra from the Mac App Store.
Note: After macOS Sierra has downloaded, it will automatically launch the installer to begin the installation process. Close the installer instead.
And please: Don't forget to back up your Mac before you do anything.

How to format your external drive for macOS Sierra
You'll need to start with a clean thumb drive or hard drive in order to make it a bootable drive.
- Plug the thumb drive (or cord) into the appropriate port on your Mac.
- Click on Finder in your Dock to open a Finder window.
Select Applications from the list on the left side of the window.
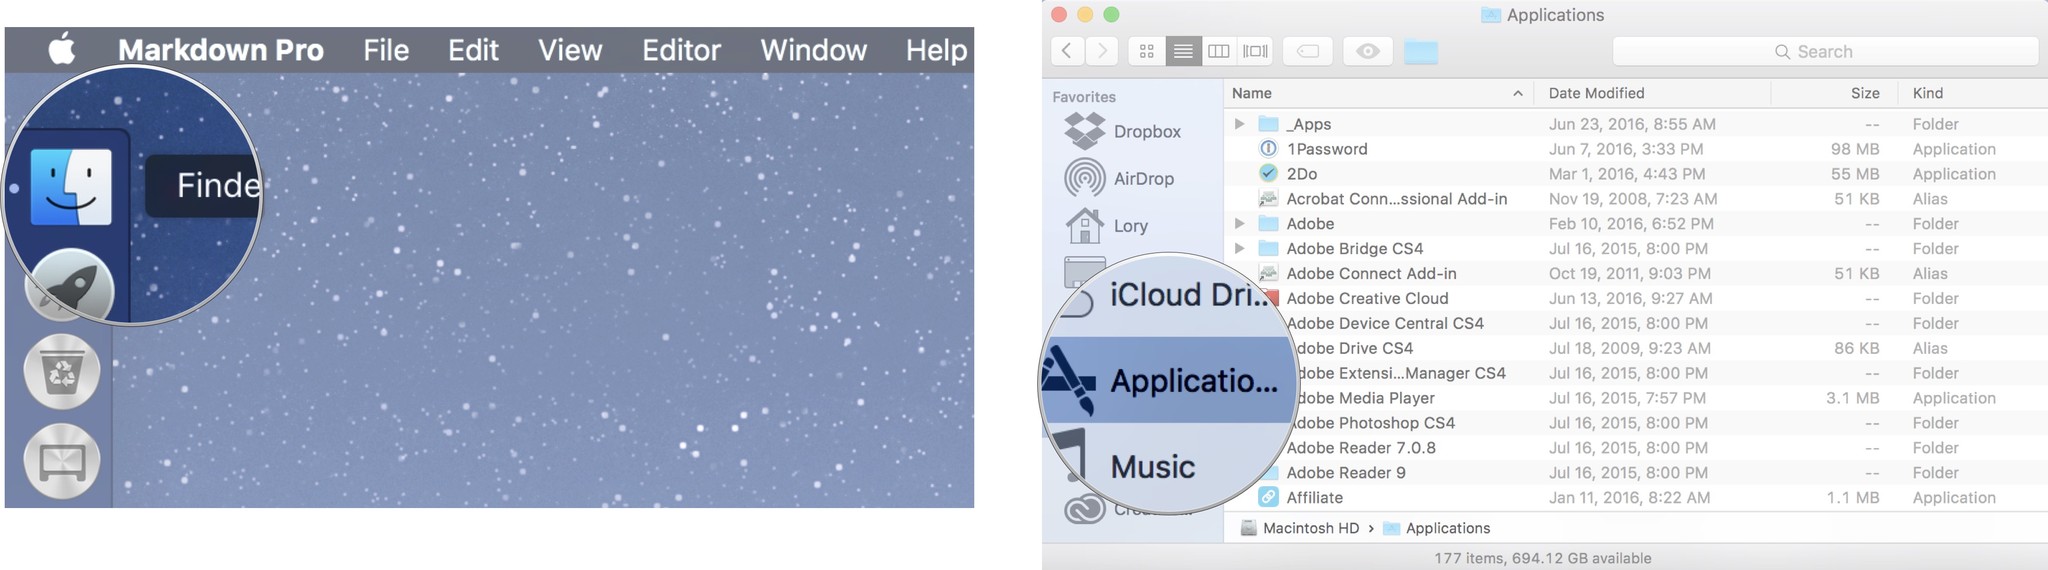
- Scroll down and double-click on Utilities.
Scroll down and double-click on Disk Utility.
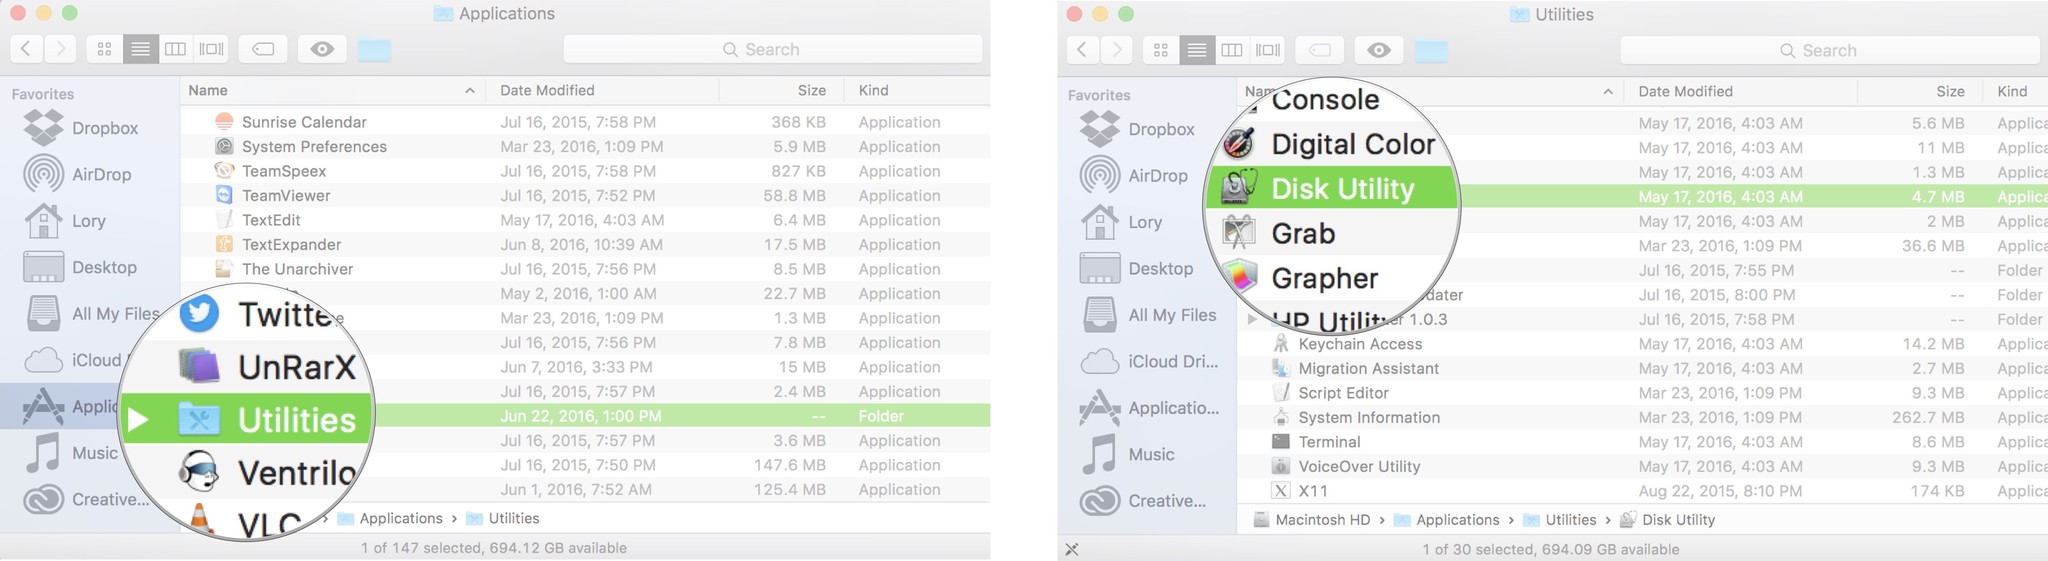
- Select your drive under External.
Click on the Erase tab at the top of the window.
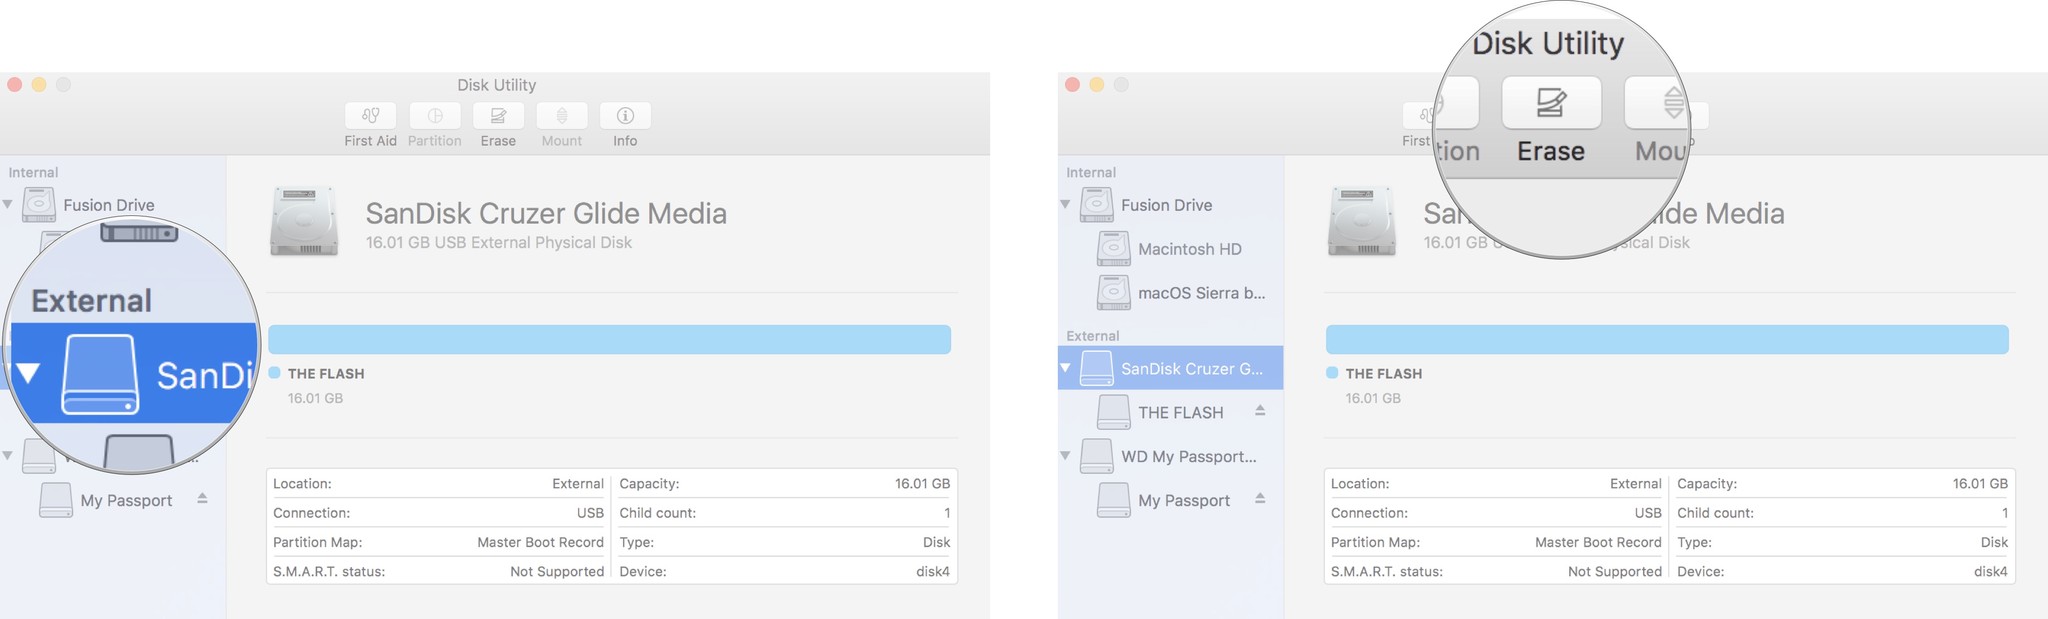
- Name the drive sierra. Or, name it something easy to remember because you will need it when you create a bootable drive.
- Select Mac OS Extended (Journaled) from the format list.
- Click Erase.
- Click Done when the process is complete.
Close the Disk Utility window.
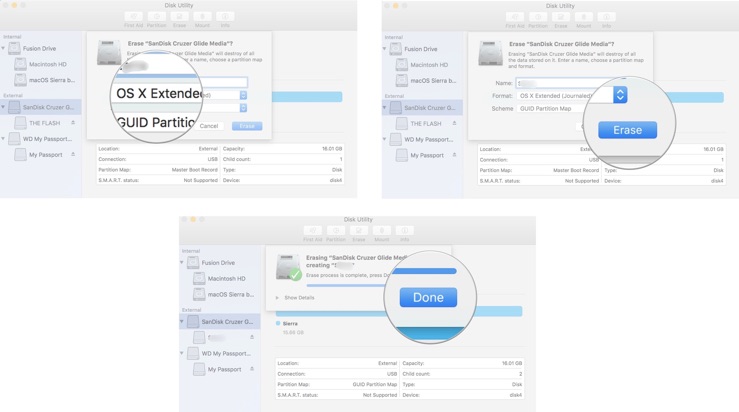
Your thumb drive or external hard drive is now ready.
How to make your external drive into a macOS Sierra boot drive
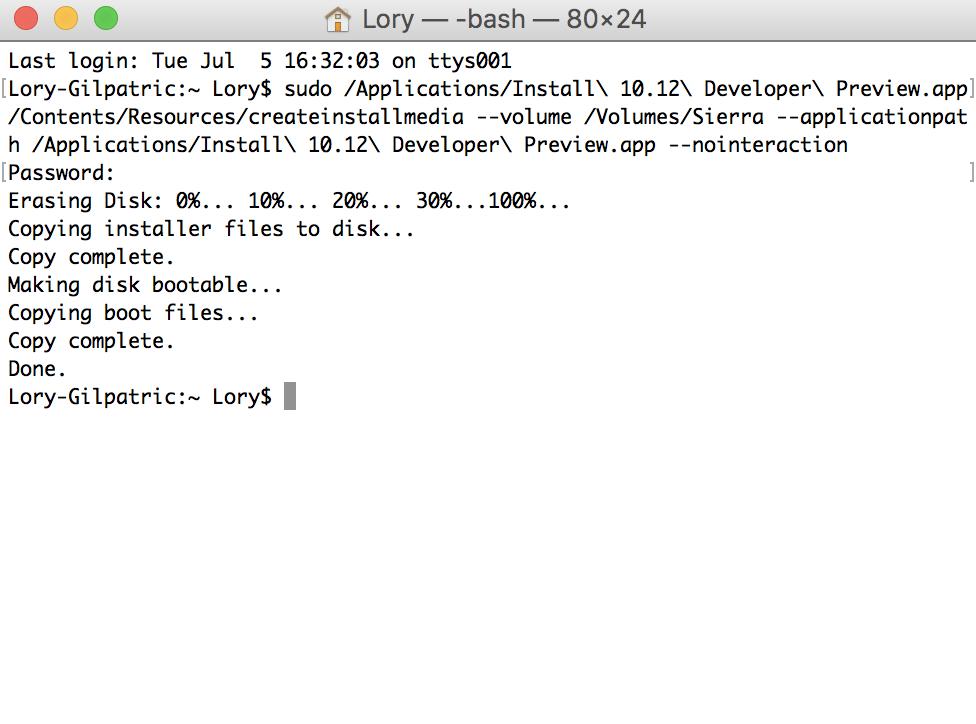
Important:You will need to use an administrator account on your Mac in order to run the Terminal commands to create a boot drive.
- Click on Finder in your Dock to open a Finder window.
Select Applications from the list on the left side of the window.
- Scroll down and double-click on Utilities.
Scroll down and double click on Terminal.

- Recall the name of your formatted external drivewhen entering the following text into Terminal. If you did not name it "sierra" you will need to change the command syntax for the pathname where it says: Volumes/sierra.
Enter the following text into Terminal:
sudo /Applications/Install macOS Sierra.app/Contents/Resources/createinstallmedia --volume /Volumes/sierra --applicationpath /Applications/Install macOS Sierra.app --nointeraction
Hit the enter/return key.
- Enter your administrator account password. This is the password you use to make changes on your Mac or log in. No text will appear in Terminal when you enter the password.
The process could take a very long time, depending on the drive. When it is done, the Terminal window will report "Done."
How to use macOS Sierra with a bootable drive
Once macOS Sierra is installed on your external drive, you can boot up any Mac with the drive plugged into it.
- Turn off the Mac you want to use macOS Sierra with the bootable drive.
- Connect the drive to your Mac via the USB port.
- Turn on your ac.
- Hold down the Option key when you hear the startup chime.
- Select the external drive with macOS Sierra on it from the list of systems to start up your computer.

Questions?
Do you have any questions about how to create a bootable drive for the macOS Sierra installer? Let us know in the comments.