
How to transfer Nintendo Switch games to a microSD card
- mar
- 18
How do I transfer Nintendo Switch games to a microSD card? It's not quite as simple as it sounds.
If you plan on downloading a lot of games to your Nintendo Switch, the 32GB storage won't get you very far; however, by picking up a microSD card, you can expand the storage on your Switch to better accommodate your downloading habits. While this information is useful for the future, if you have already downloaded games onto your Nintendo Switch system memory and you want to transfer them to your microSD card, you'll have to jump through a few hoops.
It's not quite as easy as transferring a screenshot, but you can follow along below, and I'll show you how it's done!
How to transfer Nintendo Switch games to a microSD card
- Insert your microSD card into the Nintendo Switch console. The slot is located behind the kickstand. Make sure your Switch is off.
- Turn on your Switch.
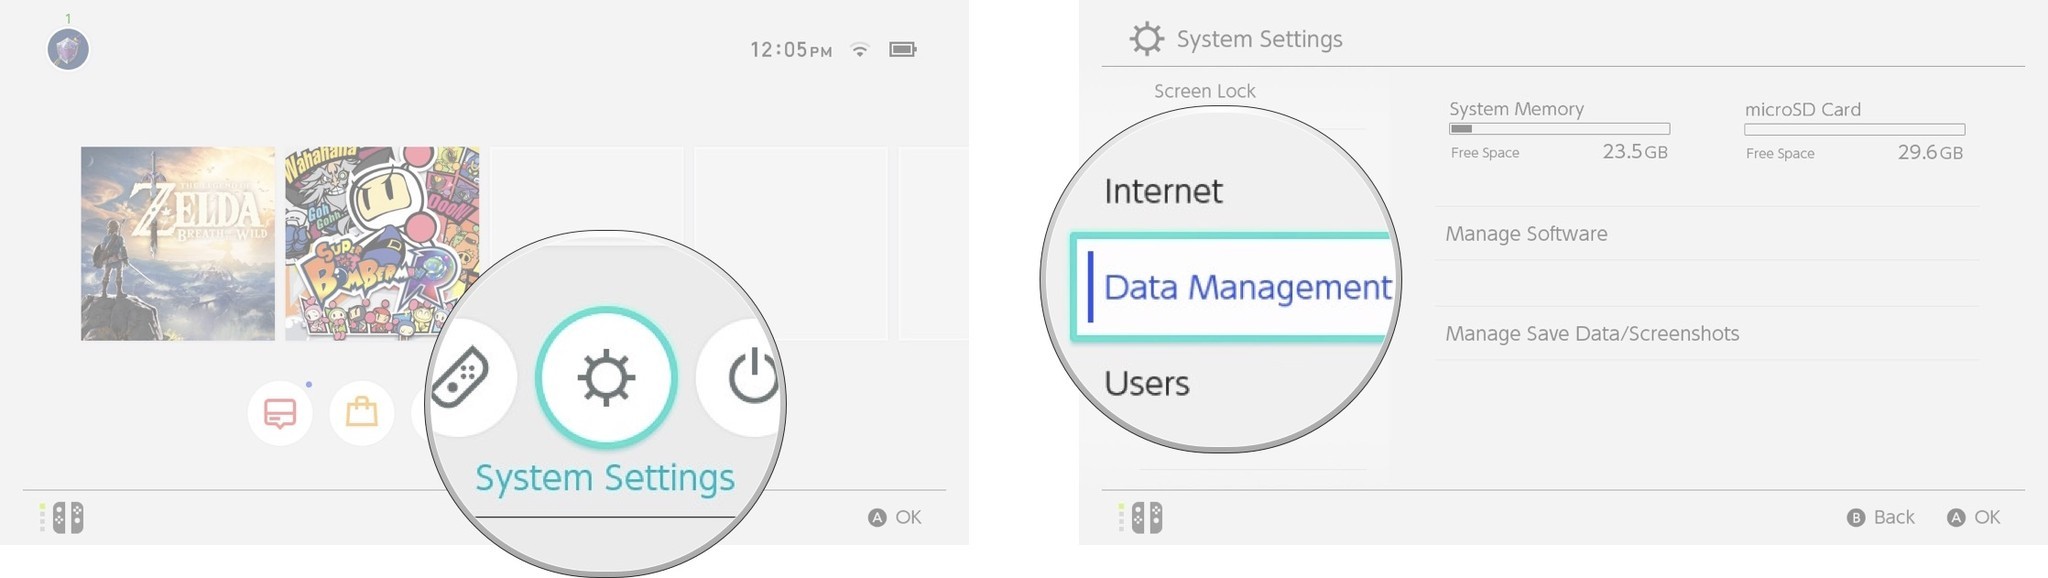
- Select System Settings from your Switch's Home screen.
Select Data Management. You'll need to scroll down a bit.
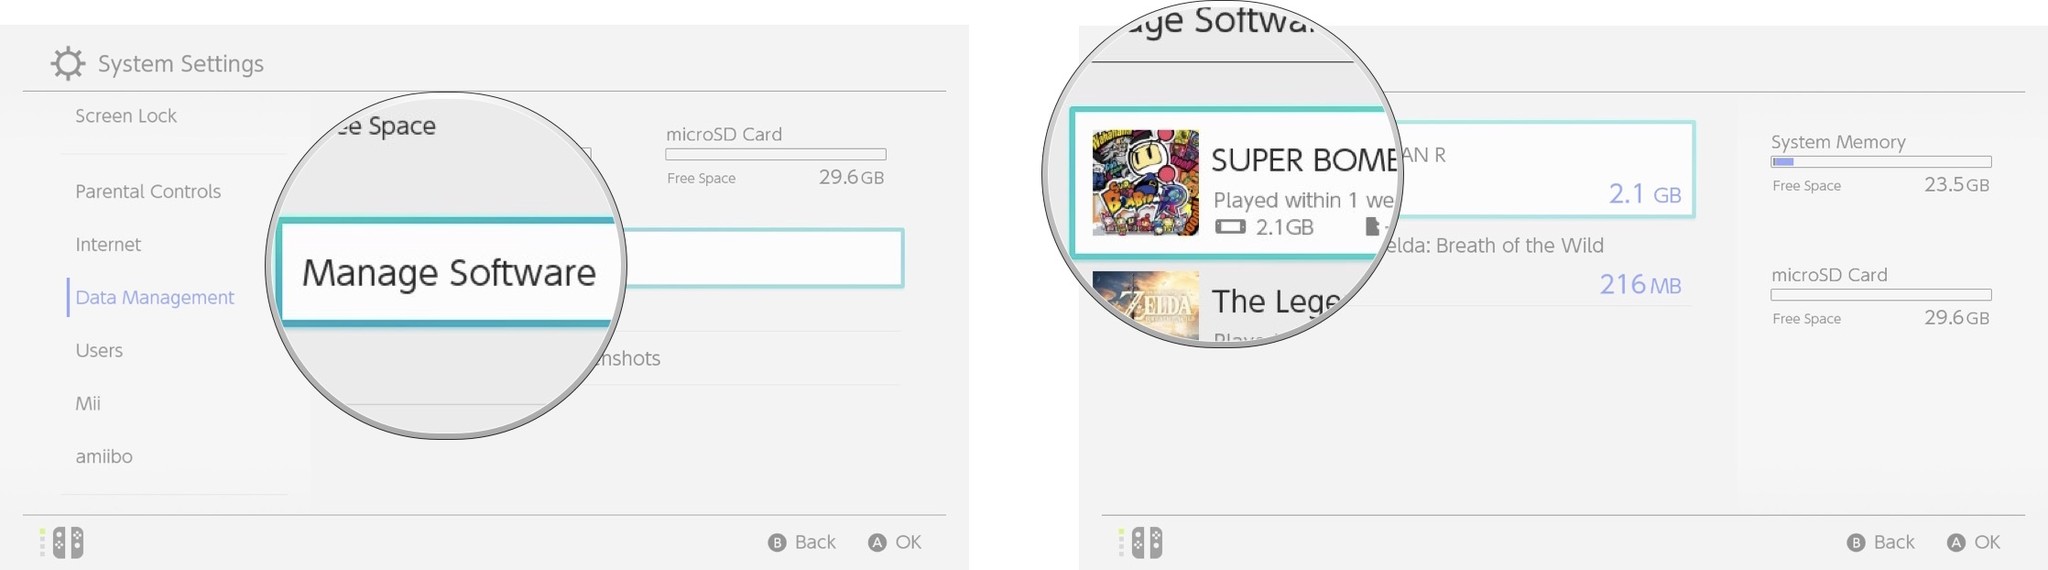
- Select Manage Software.
Select the game you want to transfer.
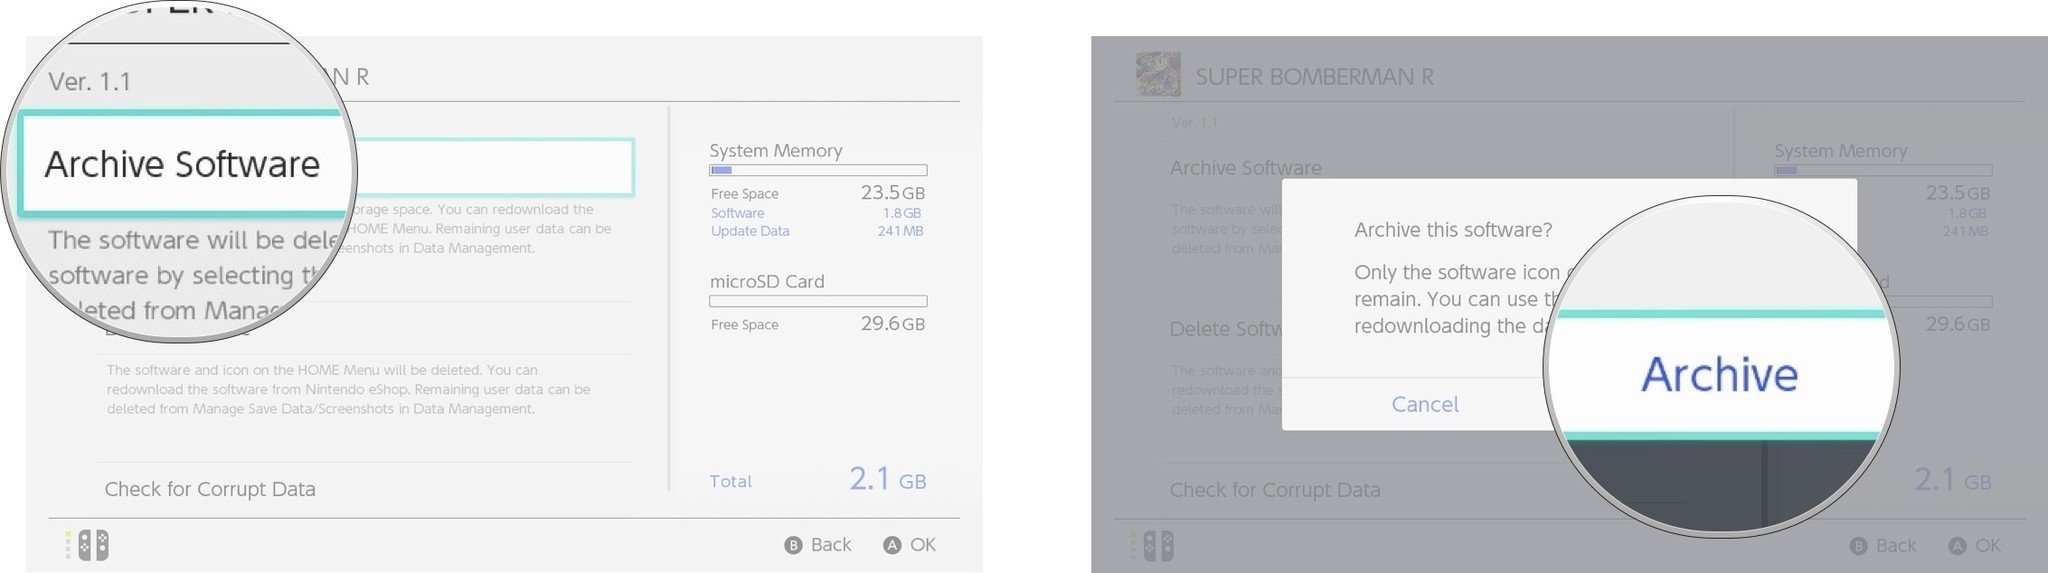
- Select Archive Software.
Select Archive.
- Press Home button to go back to your Home screen. It's on the right Joy-Con underneath the thumbstick.
- Select the archived game from your Home screen.
Select Download.

The game will download onto your microSD card automatically. Remember that you can play the game off the microSD card, but save data will always save to your system memory.
Any more questions?
Any questions about transferring games to a microSD card? Let us know in the comments below.