
How to share pictures and videos in Photos for Mac
- jul
- 18

Photos for Mac makes it easy to share your pictures and videos in pretty much any way imaginable. Here's how!
Photos for Mac lets you share photos and videos with pretty much any social network and app you can find. Whether you're looking to post something on Facebook, share directly to Macs, iPhones, or iPads with AirDrop, or add to a shared Photo Stream, Photos makes it easy to share with just a couple of clicks.
Here's what you need to know about sharing pictures and video in Photos for Mac.
- How to share a single image or video with Photos for Mac
- How to share multiple images and videos at once with Photos for Mac
- How to add someone to a stream with iCloud Photo Sharing and Photos for Mac
- How to make a shared photo album on your Mac
- How to like or comment on a shared photo or video
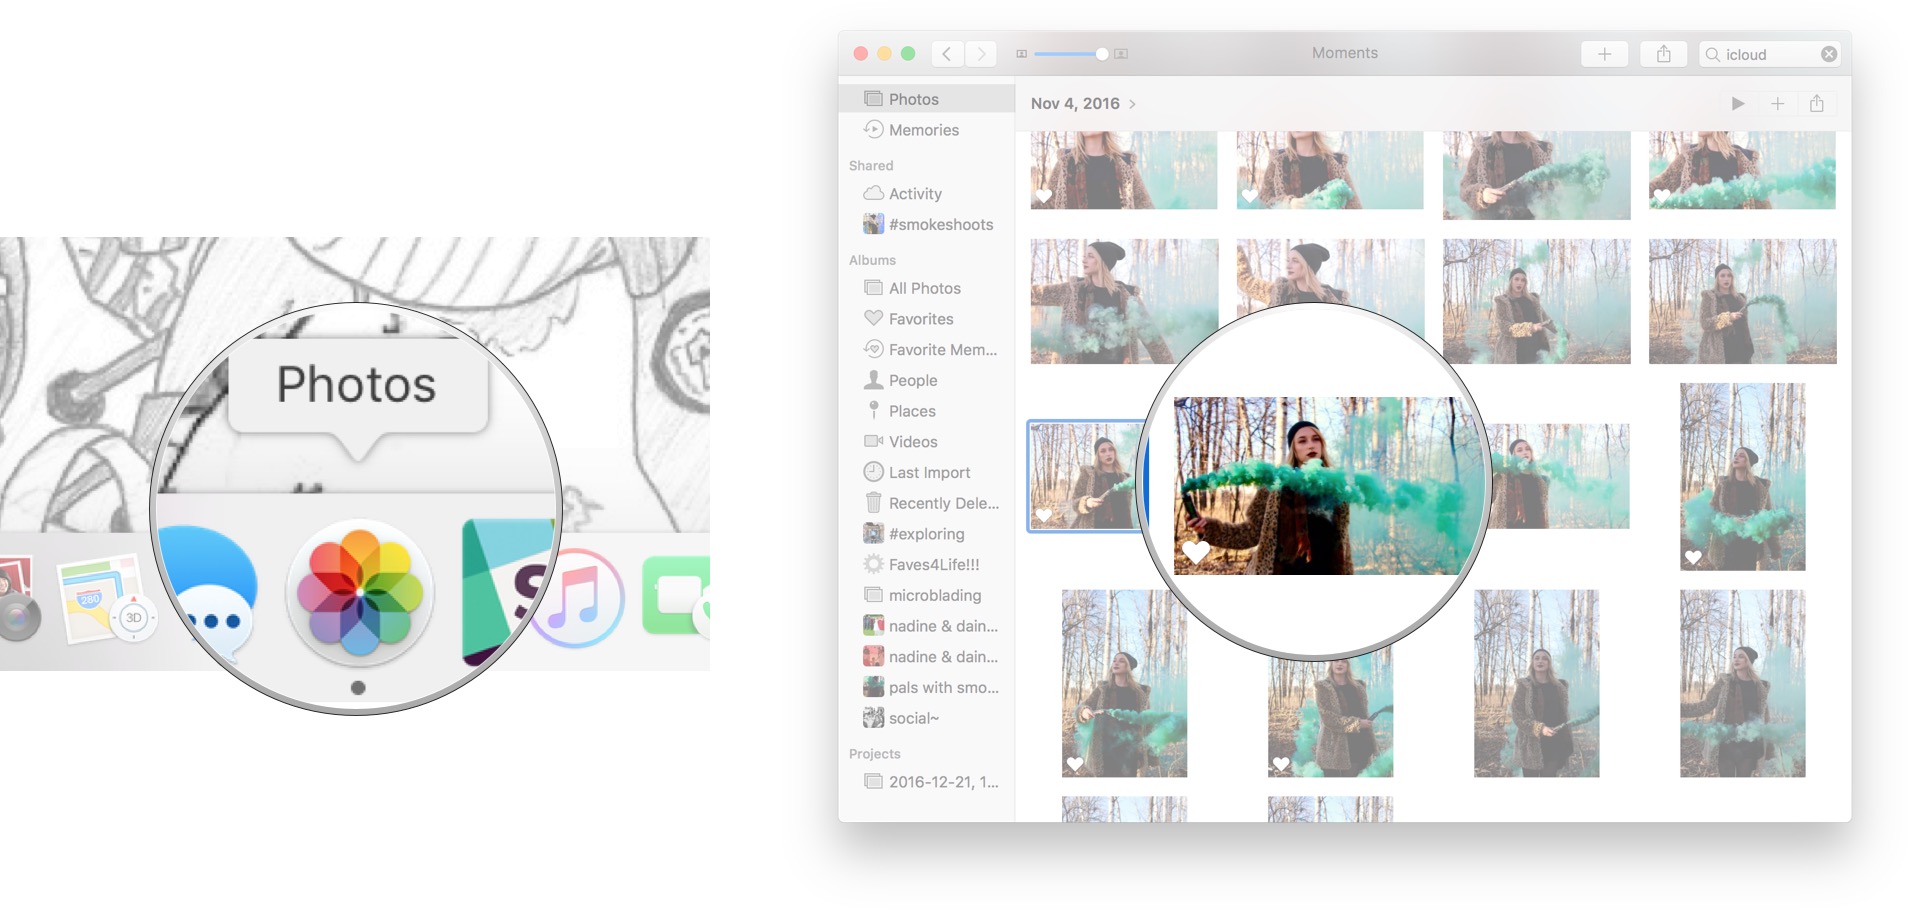
How to share a single image or video with Photos for Mac
- Launch the Photos app on your Mac.
Find the image or video you want to share and open it.
- Click on the Share button in the upper right hand corner.
Choose the method you'd like to use to share it.
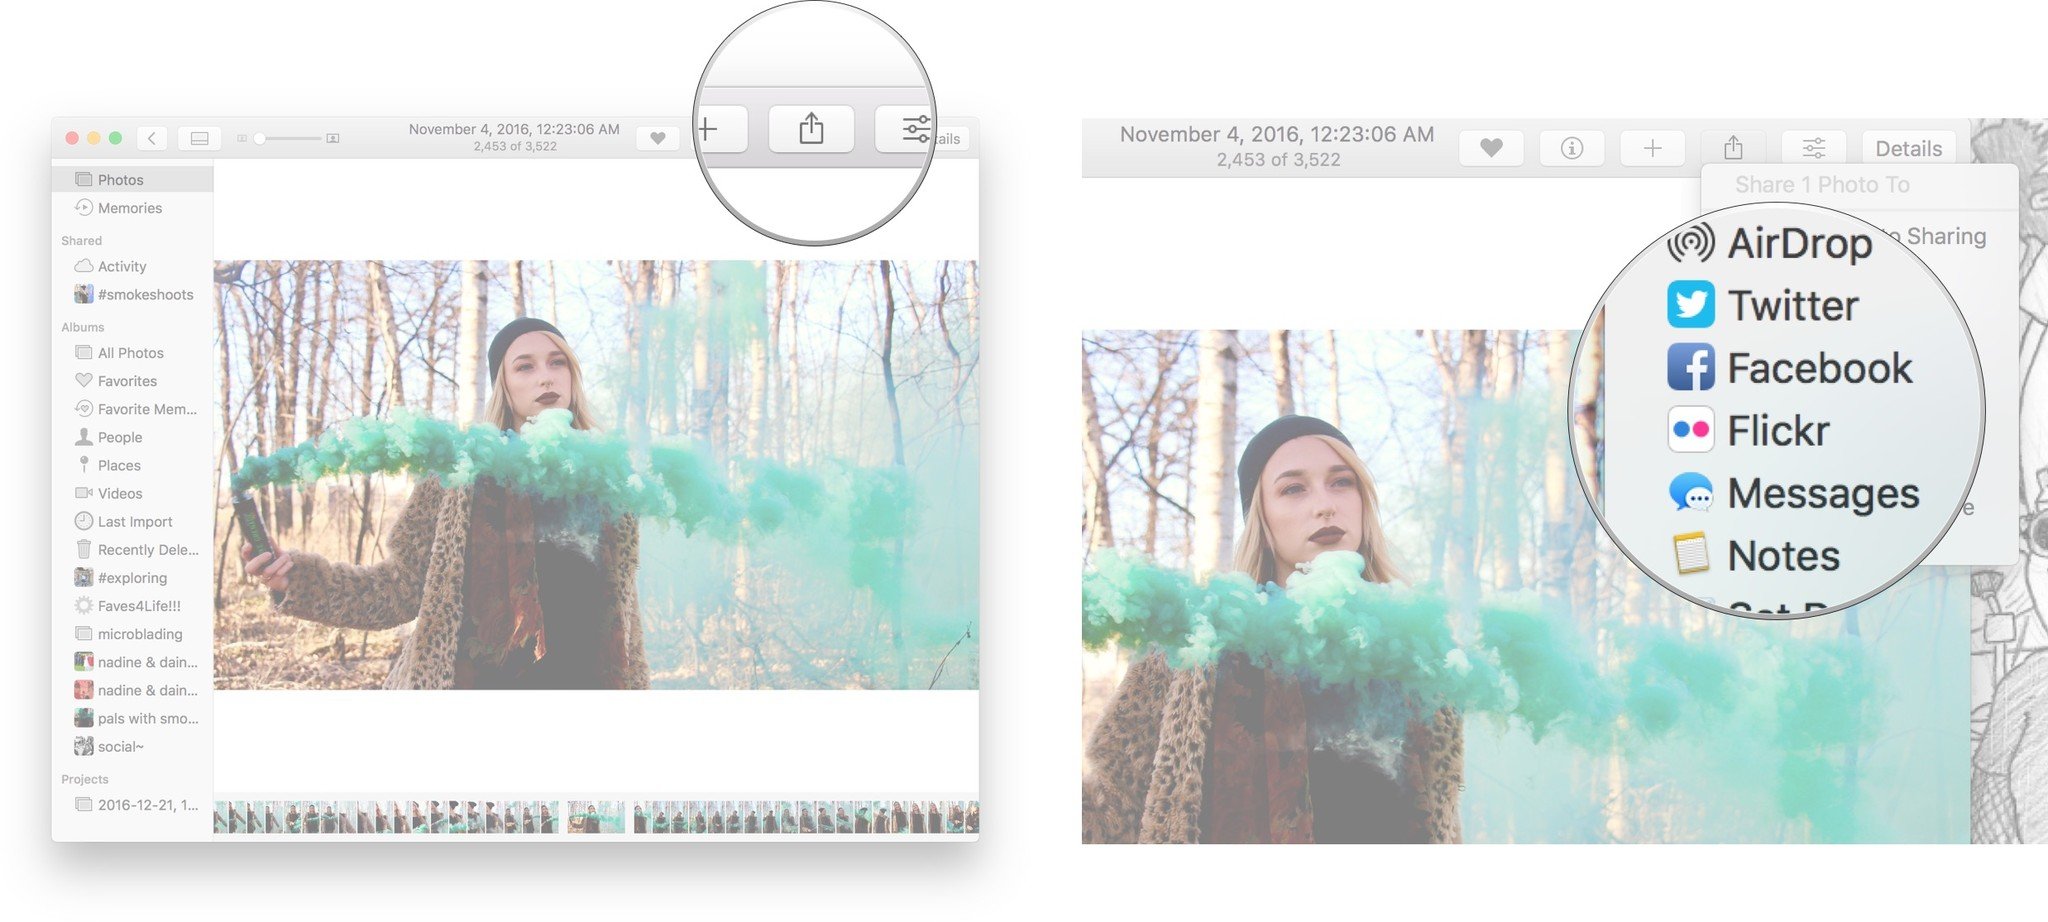
- Fill out any necessary info and send it on its way!
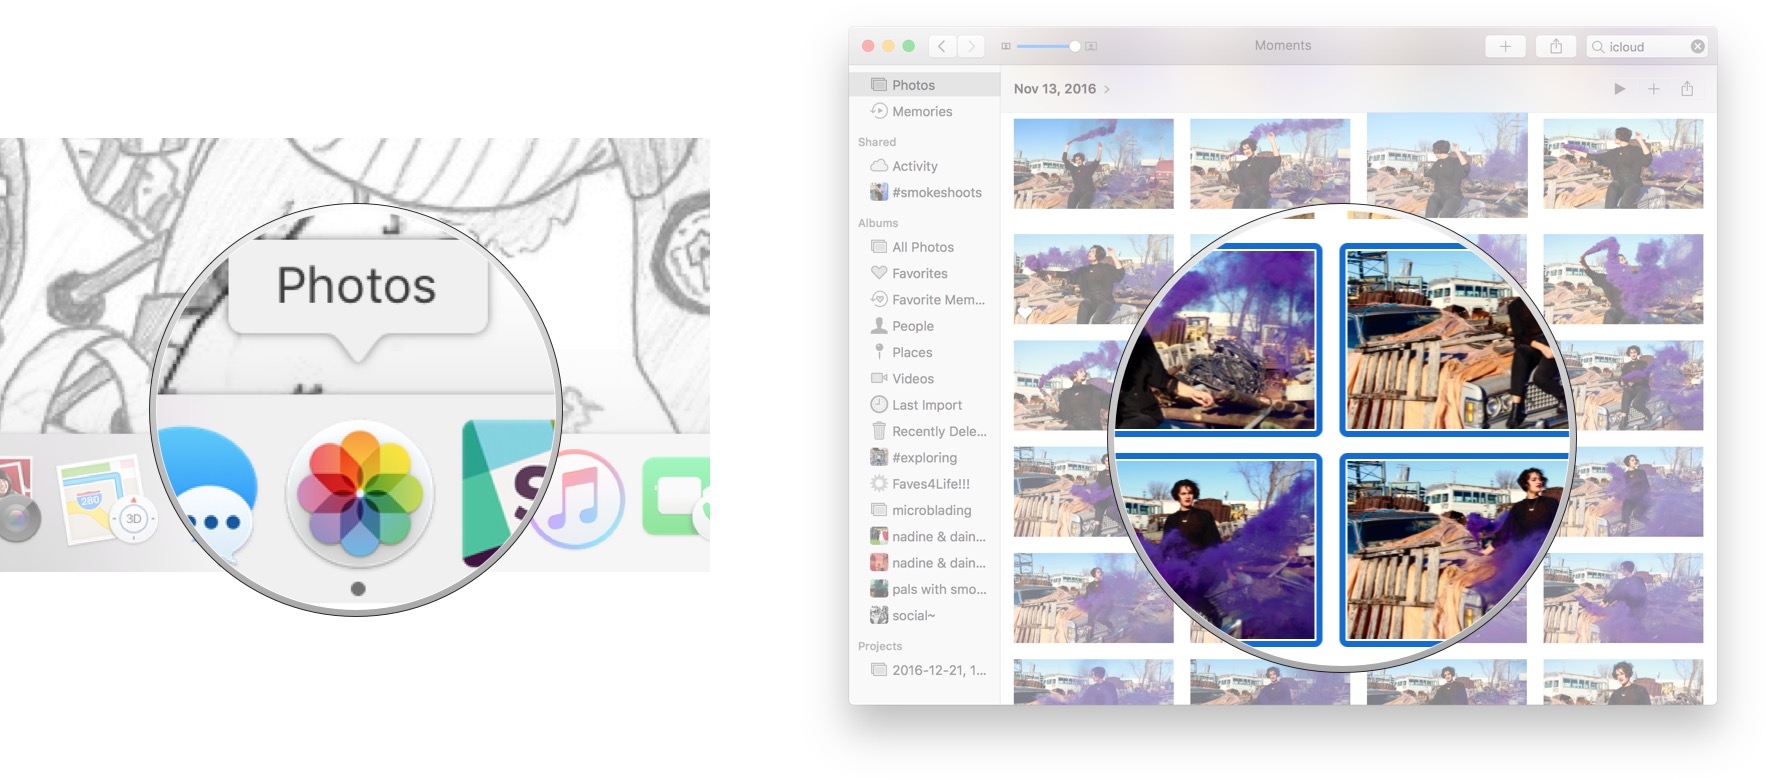
How to share multiple images and videos at once with Photos for Mac
- Launch the Photos app on your Mac.
Select the images and videos you'd like to share. Select multiples by holding down the command key.
- Click on the Share button in the top menu bar, it's off to the right.
Choose the method you'd like to use to share it.
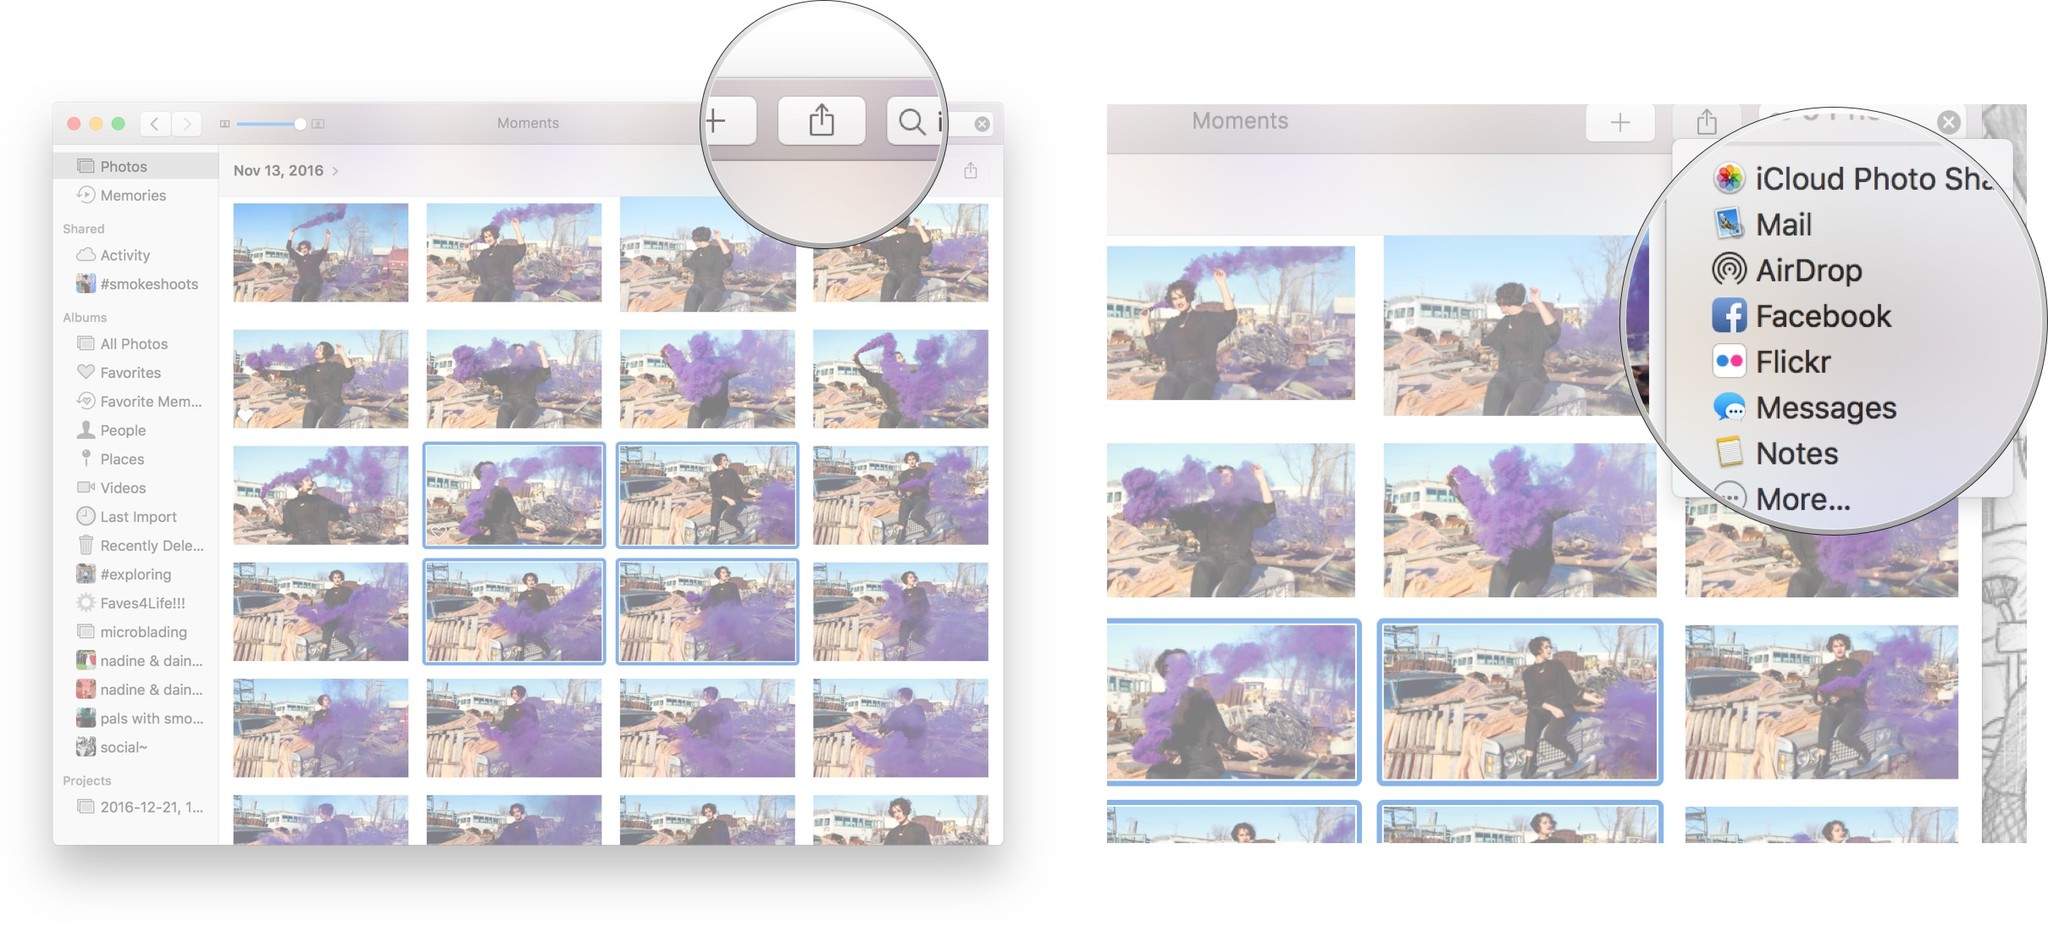
- Fill out any necessary info and send it on its way!
How to add someone to a stream with iCloud Photo Sharing and Photos for Mac
iCloud Photo Sharing is a great way to include people in special moments even when they can't be there or remember fun times with friends through the photos you each took. No matter how you use it, it's easy to include someone new in a shared iCloud album.
- Launch the Photos app on your Mac.
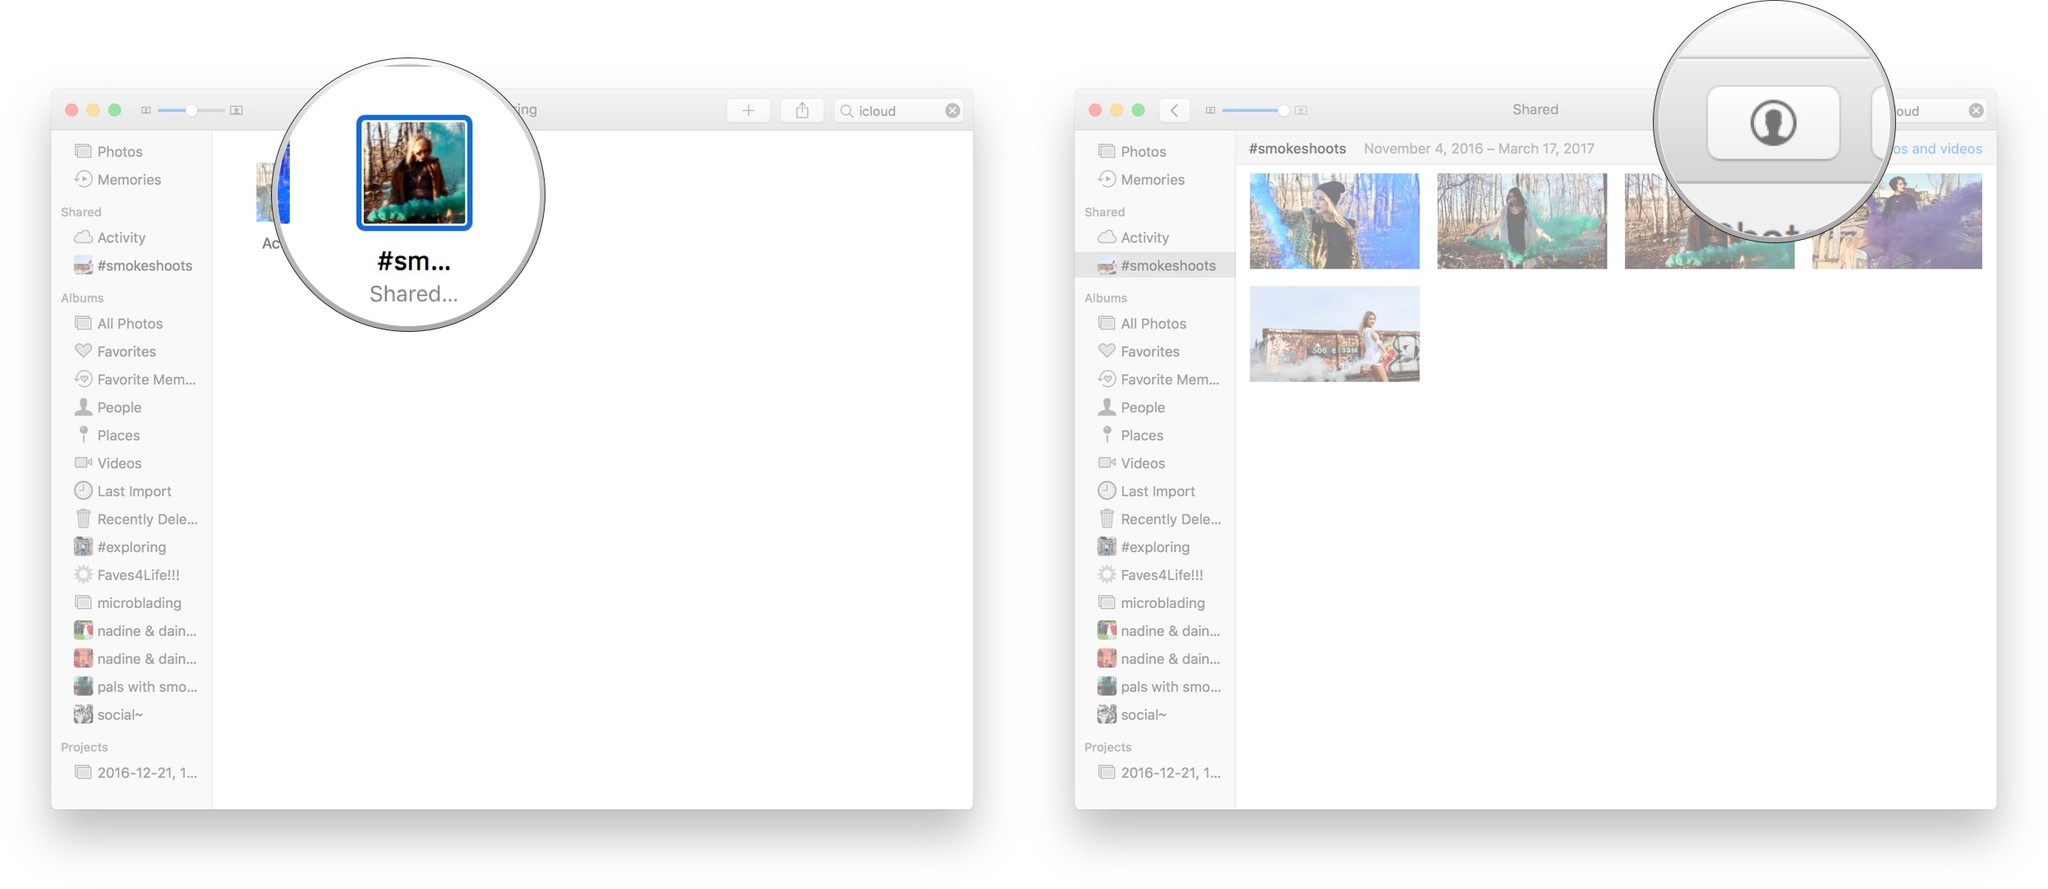
- Click on Shared Albums in your side menu.
- Click the shared album you'd like to add someone too.
Click on the members button in the top right of the menu. It looks like a little man in a circle.
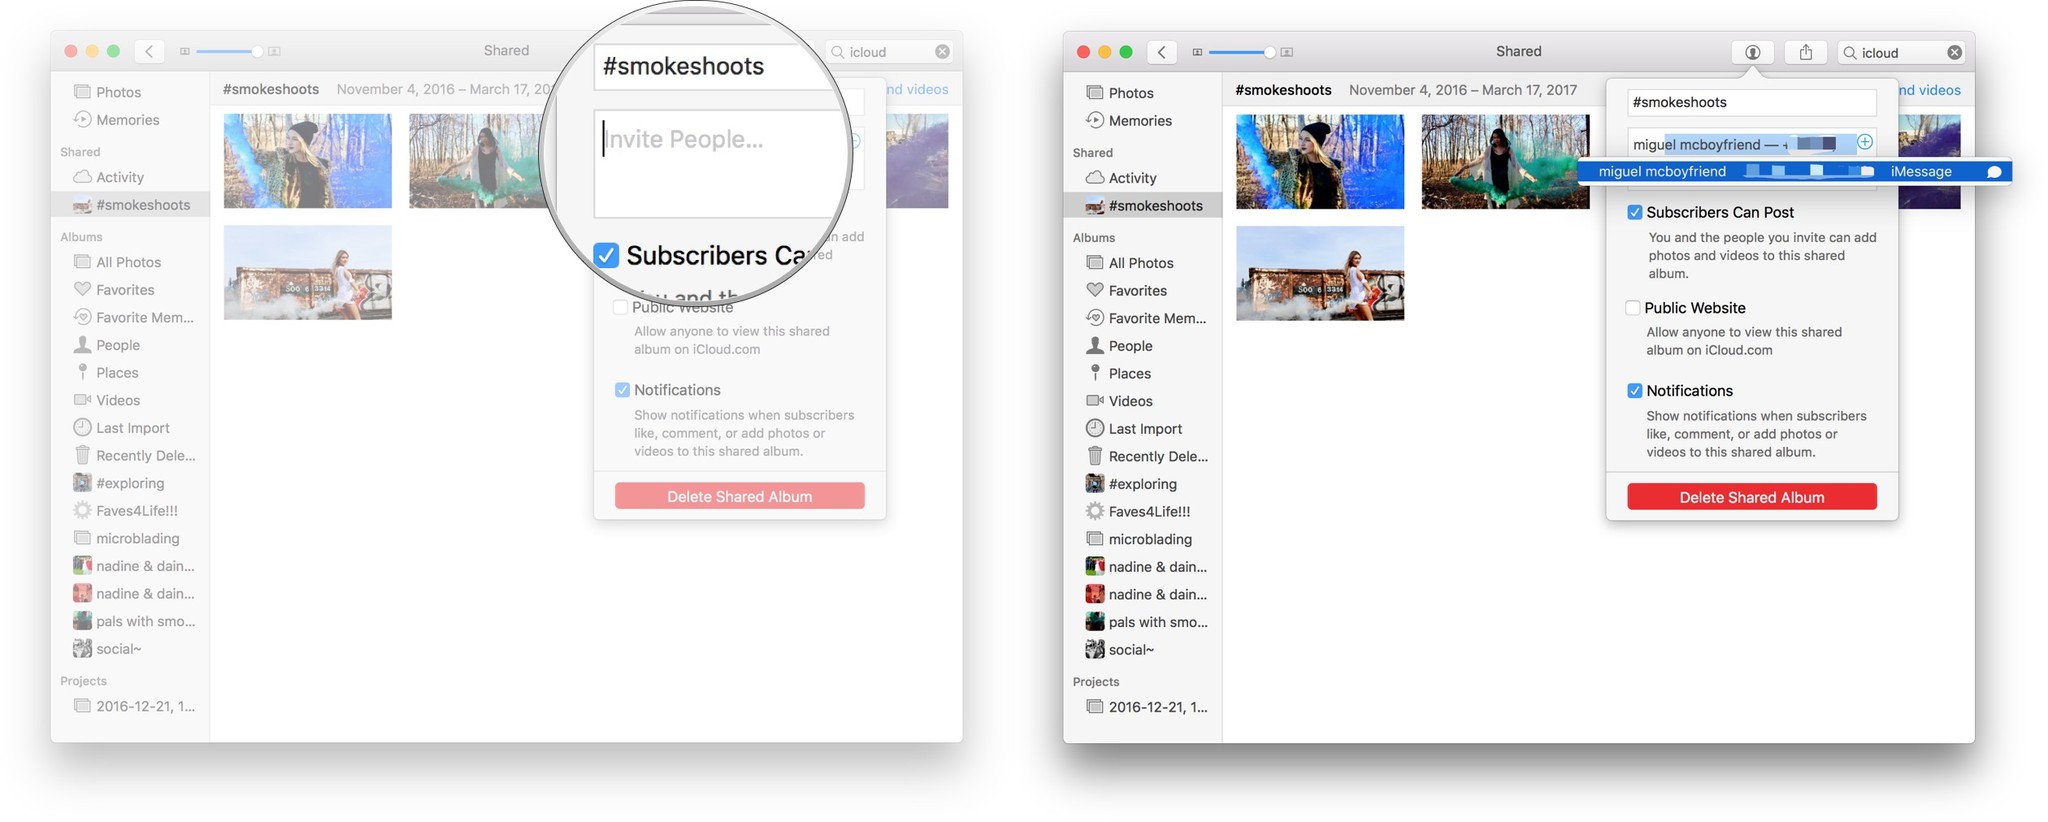
- Click inside the Invite People box and type the name of the person you'd like to add. If they're in your address book, they should automatically come up. If they aren't, you can enter their email instead of their name.
Hit Enter on your keyboard to save changes and send the invite.
How to make a shared photo album on your Mac
- Launch Photos.
- Select the images you would love to share.
- Click the Share selected photos button in the upper right corner. It looks like a box with an arrow coming out the top of it.
- Click iCloud Photo Sharing.
Click New Shared Album.

- Add in the album's information, including the title and who you would like to invite.
Click Create when you are finished.

Your shared album will now appear on your Mac and your contacts can now share photos and videos.
How to like or comment on shared photos or video
- Launch the Photos app on your Mac.
- Click on Shared Albums in your side menu.
- Double-click on the shared album you'd like to view.
Double-click the photo you'd like to comment on or like.

- Click on the comment button in the lower left corner of the image. It looks like a speech bubble with a plus sign in it.
Either click on Like to like the photo or leave a comment and hit Send.

Questions?
Let us know in the comments if you have any more questions about sharing pictures and videos using Photos for Mac.
Updated February 2018: All steps and screenshots have been updated for the latest version of Photos for macOS High Sierra.