
How to use moments, collections, and years in Photos
- jul
- 09

Photos stores all your pictures and videos, so learning how to move around and find what you're looking for is key!
To help keep your pictures and videos organized, the Photos app automatically sorts them into smart groups based on time and location. The smallest groups are Moments, larger groups are Collections, the largest, Years.
With them, you can quickly glance at when and where you were, scrub through everything and anything, see a map view of your photos spread out across the world, and even copy a photo to the clipboard so you can insert it into a message. There are still albums you can access as well. And all of it with just a few taps and swipes!
- How to move between Moments, Collections, and Years smart groups
- How to move between Years, Months, and Days in iOS 13
- How to view picture and video locations on a map
- How to view picture and video locations on a map in iOS 13
- How to scrub through and quickly jump to a picture or video in Collections or Years
- How to scrub through and quickly select a month to jump to from the Years view in iOS 13
- How to quickly copy a picture or video to the clipboard in Moments or Albums
- How to quickly copy pictures or videos to the clipboard from Moments in iOS 13
How to move between Moments, Collections, and Years smart groups
- Launch the Photos app from your iPhone or iPad Home page.
- Tap the back button on the top left of your screen. The further back you go, the larger the search area (days to months to years).
-
Tap a photo or video thumbnail to move to a smaller group. (Tapping a thumbnail in Moments view will move you to that individual photo.)

While many iOS apps let you navigate back by swiping from the left bezel, that gesture isn't available in Photos. (You can swipe between individual pictures or videos to move to the previous or next shot.)
How to move between Years, Months, and Days in iOS 13
Apple occasionally offers updates to iOS, watchOS, tvOS, and macOS as closed developer previews or public betas for iPhone, iPad, Apple TV and Mac (sadly, no public beta for the Apple Watch). While the betas contain new features, they also contain pre-release bugs that can prevent the normal use of your iPhone, iPad, Apple Watch, Apple TV, or Mac, and are not intended for everyday use on a primary device. That's why we strongly recommend staying away from developer previews unless you need them for software development, and using the public betas with caution. If you depend on your devices, wait for the final release.
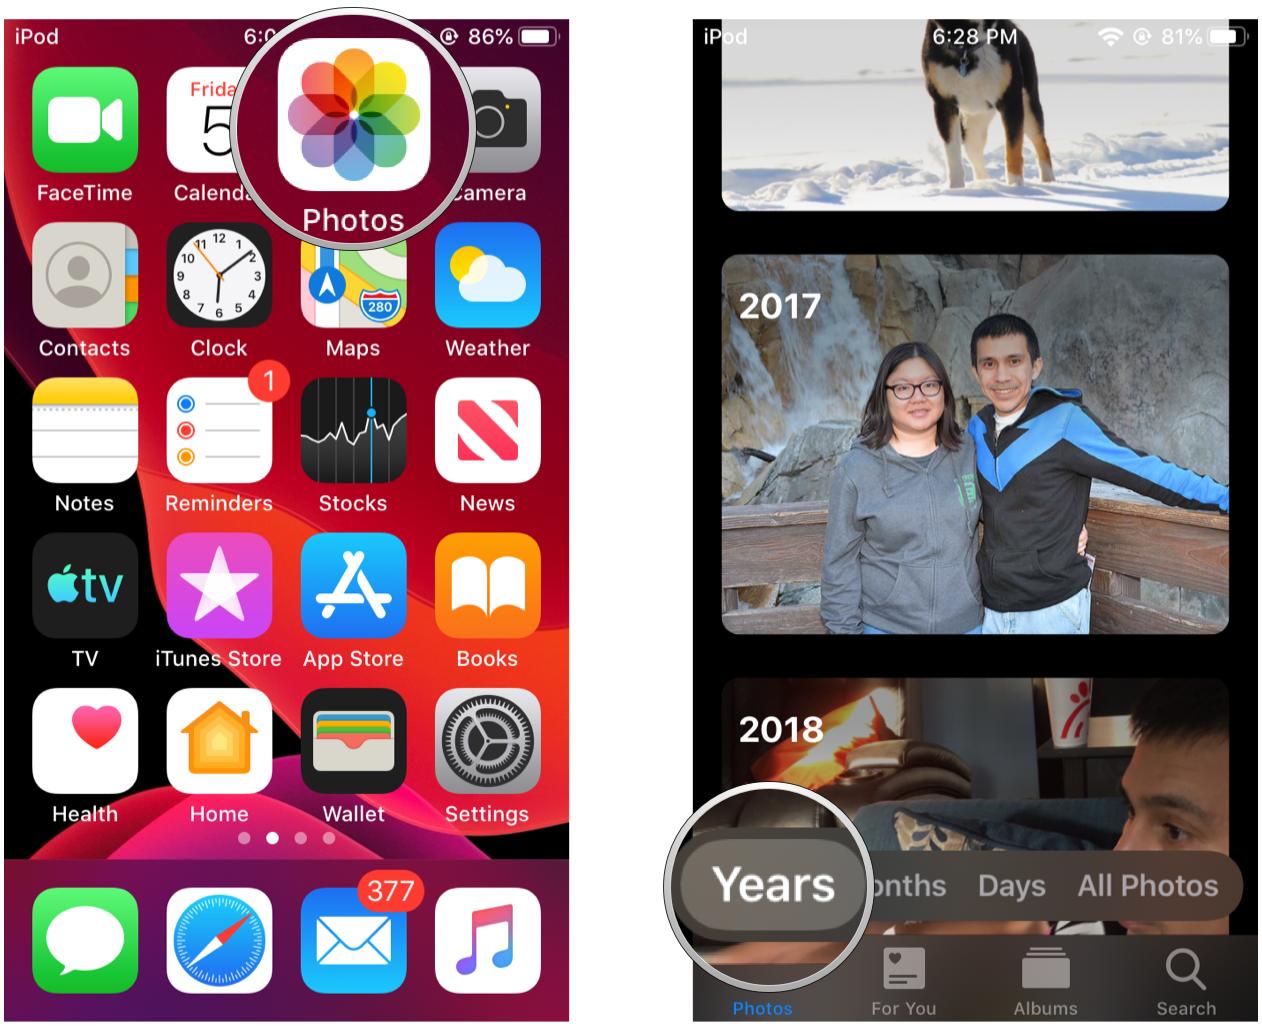
- Launch Photos from your iPhone or iPad with iOS 13.
-
Tap on the Photos tab if you're not already there.

- Tap on the timeline view that you want to see: Years, Months, Days, or All Photos.
- If you start at Years and then tap on a year, it will drill down into Months.
- If you're in Months and tap on a month, it goes into Days view.
- Tapping on an image essentially takes you into the All Photos view.
-
You can back out of your view by tapping on Years, Months, or Days in the menu bar above the tabs for Photos.

You can swipe from the left bezel of your device to go back to the previous level. However, if you are viewing individual photos, this gesture won't work. You will need to tap on the back button in the top left, as swiping only goes to the previous or next photo.
How to view picture and video locations on a map
While Moments, Collections, and Years all give you the names of the locations where your pictures and videos were taken, they can also show you those locations on a map.
- Launch the Photos app from your iPhone or iPad Home page.
- Tap on the name of the location above the group of photos for which you'd like a location.
-
Swipe up to find the map. It may take a little bit of scrolling.
 You'll have to make sure your Location Services are turned on and that you have them enabled for your Camera app. If you didn't have them on before, turning them on won't show you the location of photos you've already taken.
How to view picture and video locations on a map in iOS 13
Apple occasionally offers updates to iOS, watchOS, tvOS, and macOS as closed developer previews or public betas for iPhone, iPad, Apple TV and Mac (sadly, no public beta for the Apple Watch). While the betas contain new features, they also contain pre-release bugs that can prevent the normal use of your iPhone, iPad, Apple Watch, Apple TV, or Mac, and are not intended for everyday use on a primary device. That's why we strongly recommend staying away from developer previews unless you need them for software development, and using the public betas with caution. If you depend on your devices, wait for the final release.
- Launch Photos on your iPhone or iPad with iOS 13.
-
Make sure you are on the Photos tab, where you can switch between Years, Months, Days, and All Photos as described above.

- In either Months or Days view, tap on the "..." button that is shown on the collection thumbnail.
-
Tap Show Map.
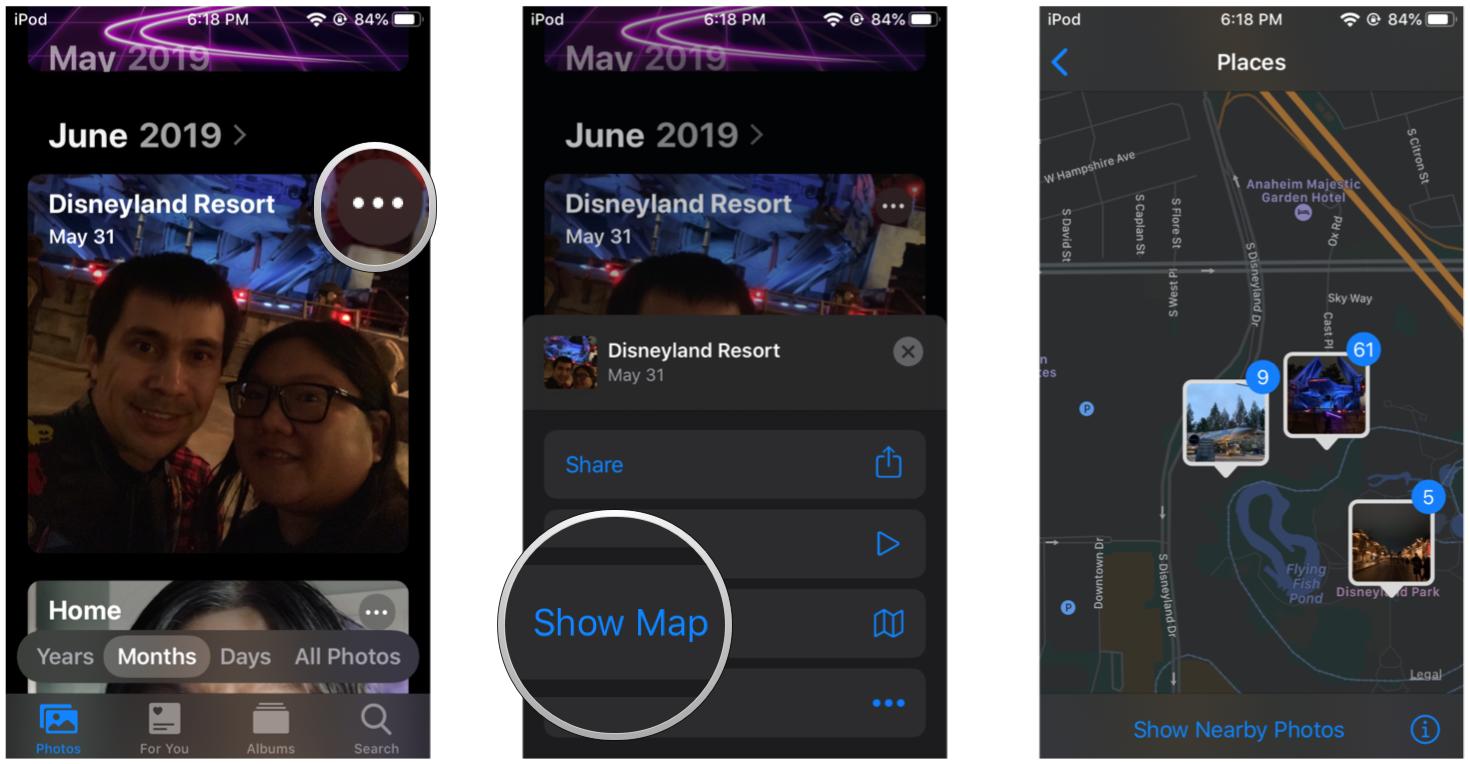
A map will pull up and show you where the photos for that day or month were taken on a map. Again, you need to have Location Services turned on for your Camera app in order to record the geolocation data when taking photos. This cannot be applied retroactively.
You can also still view location data on an individual photo or video by viewing it and then scrolling down.
How to scrub through and quickly jump to a picture or video in Collections or Years
Because of the volume of photos in Collections or Years view, the thumbnails are small and can be hard to see. Luckily, there's a scrubbing gesture that not only lets you get a better look, but also lets you jump immediately to that picture or video so you don't have to tap your way through Moments first.
- Launch the Photos app from your Home screen
- Tap and hold on the Year or Collection view screen.
- Lightly tap and slide your finger back and forth across the collection. This will give you a larger thumbnail view of each photo.
-
Press firmly on the photo you'd like to view. If you have a pre-3D Touch iPhone model, then just hold on that photo.

How to scrub through and quickly select a month to jump to from the Years view
Apple occasionally offers updates to iOS, watchOS, tvOS, and macOS as closed developer previews or public betas for iPhone, iPad, Apple TV and Mac (sadly, no public beta for the Apple Watch). While the betas contain new features, they also contain pre-release bugs that can prevent the normal use of your iPhone, iPad, Apple Watch, Apple TV, or Mac, and are not intended for everyday use on a primary device. That's why we strongly recommend staying away from developer previews unless you need them for software development, and using the public betas with caution. If you depend on your devices, wait for the final release.
In iOS 13, you can't exactly view a year's worth of photos at a glance as you could in previous iterations of iOS. Instead, each year is represented by a tile that rotates through an image from each month of the year. Tapping on the year tile will jump into the month for the image that was being shown in the tile as you tapped it. You can adjust quickly jump to a month by using the scrubbing gesture.
- Launch Photos on your iPhone or iPad with iOS 13.
- Make sure you're in the Photos tab that organizes by Years, Months, and Days.
-
Tap on the Years view in Photos.
- Find the year you want to view.
-
Drag your finger horizontally across the tile.
- You should see the month appear underneath the year, and the tile's thumbnail changes as you go through the months.
-
Tap on collection tile to automatically jump into the month that you left it on while scrubbing.

How to quickly copy a picture or video to the clipboard in Moments or Albums
If you see a picture or video in Moments or Album view that you really want to copy to the clipboard so you can paste it into a message or document (where supported), you don't have to go through all the taps to get to the Share Sheet. There's a gesture shortcut that lets you do it right away.
- Launch the Photos app from your Home screen.
- Tap Select in the top right corner of the screen.
-
Tap the photo or video you'd like to copy.

- Tap the share button on the bottom left of the screen. It's a box with an arrow pointing upward.
-
Tap Copy on the popup menu.

How to quickly copy pictures or videos to the clipboard from Moments in iOS 13
Apple occasionally offers updates to iOS, watchOS, tvOS, and macOS as closed developer previews or public betas for iPhone, iPad, Apple TV and Mac (sadly, no public beta for the Apple Watch). While the betas contain new features, they also contain pre-release bugs that can prevent the normal use of your iPhone, iPad, Apple Watch, Apple TV, or Mac, and are not intended for everyday use on a primary device. That's why we strongly recommend staying away from developer previews unless you need them for software development, and using the public betas with caution. If you depend on your devices, wait for the final release.
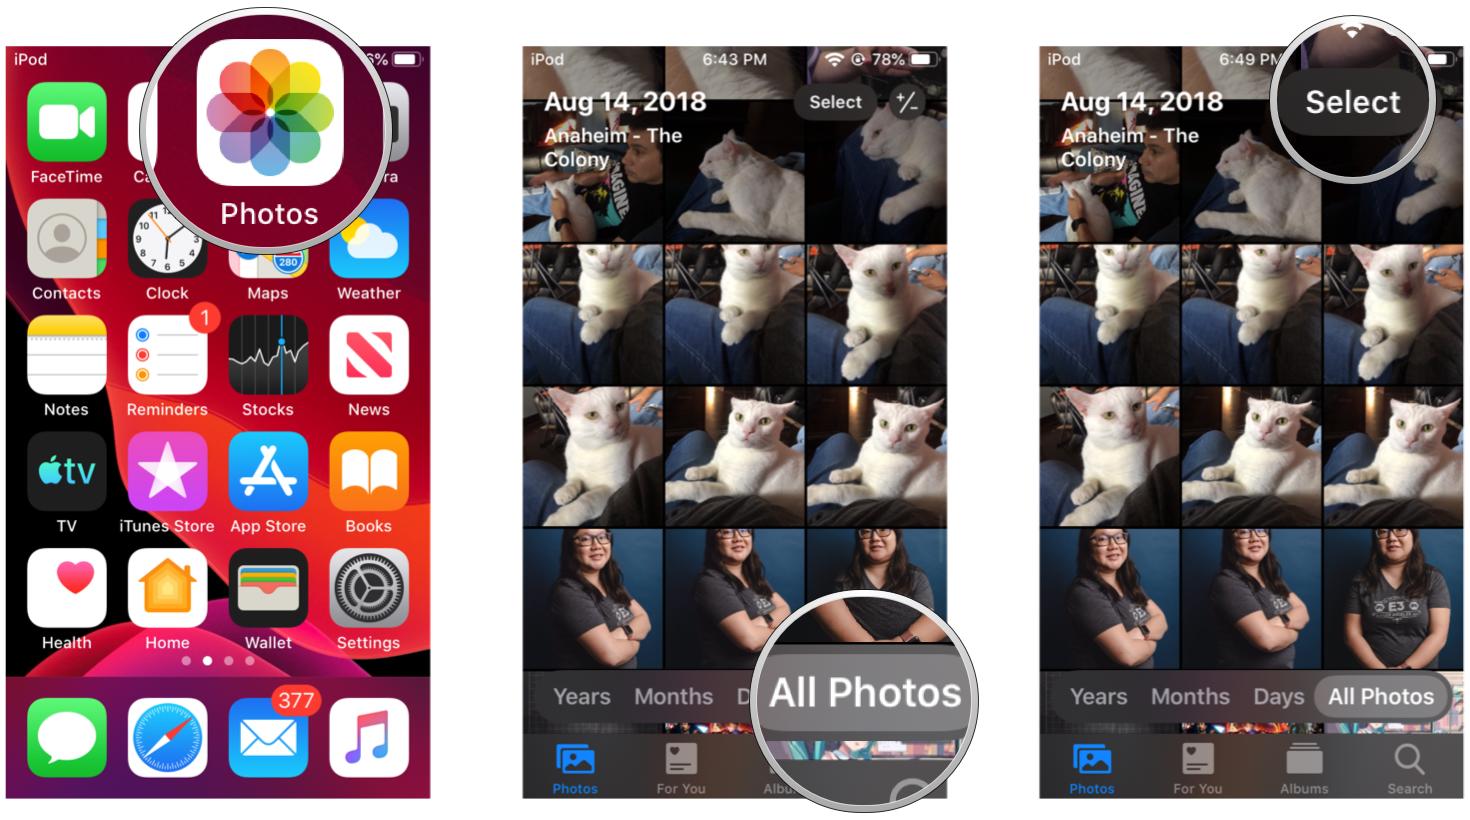
- Launch Photos on your iPhone or iPad.
- Go into the Photos tab if you're not already in there.
- Find the photos or videos that you want to share from the All Photos view.
-
Tap on Select in the top right.
- Tap on the photos or videos that you want to share, or drag your finger across rows and columns to quickly select a batch.
- Tap on Share.
-
Scroll down and select Copy Photos.

Now your photos or videos will be on your device's clipboard, so you can paste them into a message or document where media is supported.
July 2019: Updated for iOS 13 beta.